Collections
The collection module is an important tool for bridgebills to efficiently manage their customer payments, advances, and refunds.
Collections Module includes the following features:
Collections
Collection module helps to capture the amount that you have received from the customer with respect to their Invoice.
Note *
Collections received from the customer i.e. approved and unapproved collections will be displayed on the collection list page.
You can filter the collection data by entering the Collection Number, Customer Name or Collection Date.
Steps to Add New Collection
- Step 1
Go to Collection → Collections → New Collection
- Step 2
Enter Customer Information
Enter the Customer Name,Date,Account,Currency,Document, Amount received ,Cheque Number,Reference,Notes.

When a customer is selected from the customer drop-down, All the invoice related to that particular customer will be displayed below.

- Step 3
- Register Payment Received
Enable the checkbox of the respective Invoice, enter the amount paid and make sure that the Remaining Amount is 0.
Green Tile and Red Tile displays the approved and unapproved collections respectively.You can view the details of the collection made, by clicking the amount displayed on Green and Red Tile.
- Step 4
- Apply Additional Charges and Saving option
Click on "Add transaction" if additional charges like Bank charges, Input VAT etc needs to be applied

Final step is to click on Save.
Clicking on "Collections" switches you back to the Collections list page.
Actions performed
- Edit/Delete(Approved collection cannot be Edited/Deleted)
- Approve/Disapprove
- Send Email
Note *
We have provided the submodules of the collection module for easier navigation.
The Export Dropdown feature allows users to export the document in Excel and Print.
To add a module to the favourites list, click on star.

Apply Credit
In the Apply Credits feature of Bridgebills software, you can provide an option to collect the invoice amount of the customer from the advance received.
Credit can be applied by 2 methods.
- Method 1
- Go to Collections → Collections→ Apply Credits
- Step 1
- Enter Customer Information
Select the customer and the advance received.
The balance advance amount will be displayed on the Balance Amount column. Also,the approved refund from the respective advance will be displayed on the refund amount column.
- Step 2
- Register Amount Collected From Advance
Enable the checkbox of the respective Invoice and enter the amount to be collected from advance.
Green Tile and Red Tile displays the approved and unapproved collections respectively.You can view the details of the collection made, by clicking the amount displayed on Green and Red Tile. Final step is to click on Save.

- Method 2
- Go to Collections → Advances → Apply to Invoice

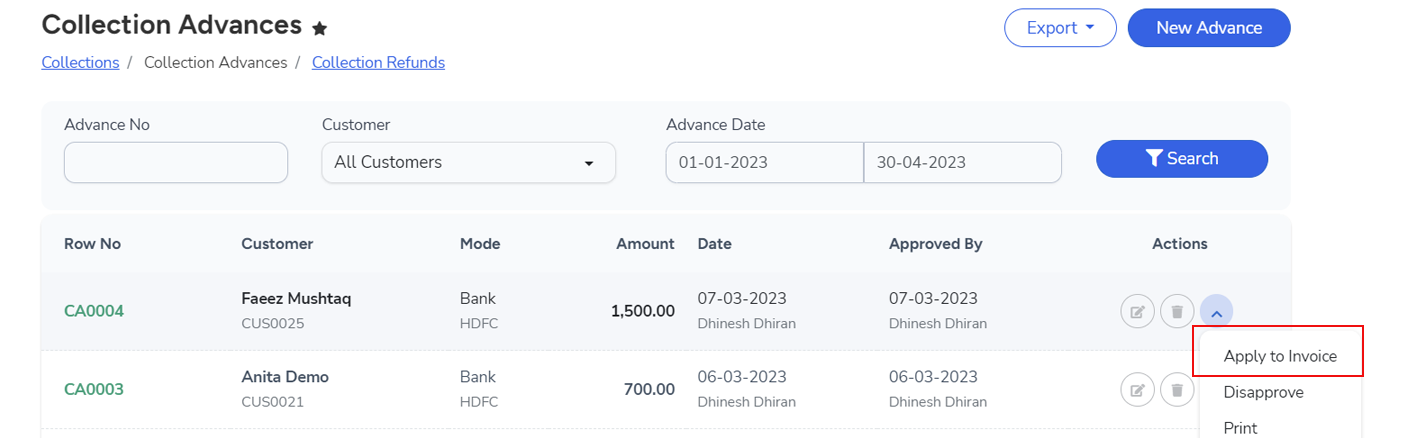
Advances
The advance module is used to create and manage the advance collected from the customer and to apply the same to their Invoice.
- Advance received from the customer i.e. approved and unapproved advance will be displayed on the collection advance list page.
- You can filter the collected advance data by entering the Advance Number, Customer Name or Advance Date.
Steps to Add New Advance
- Step 1
- Go to Collections → Advances → New Advance
- Step 2
- Enter Customer Advance Information
Enter the Customer Name,Date,Account,Currency,Document, Amount received i.e. Advance Collected,Cheque Number,Reference,Notes.
- Step 3
- Apply Additional Charges and Saving option
Click on “Add transaction” if additional charges like Bank charges, Input VAT etc needs to be applied
Final step is to click on Save.Save and new option is available in the dropdown to add a new advance along with saving the current data.
Clicking on “Collection Advances” switches back to the advance list page.

Actions performed
- Edit/Delete (Only disapproved advance can be Edited/Deleted)
- Approve/Disapprove
- Apply to Invoice
- Unlink (An option to delete the collection, adjusted from advance)
- Send Email
Note *
We have provided the submodules of the collection module for easier navigation.
The Export Dropdown feature allows users to export the document in Excel and Print.
To add a module to the favourites list, click on star.
Refunds
The refund module in Bridgebills software helps you to create and manage refunds made to customers from the advance collected.
- The refund applied to the customer i.e. approved and unapproved refund will be displayed on the collection refund list page.
- You can filter the customer refund data by entering the Refund Number, Customer Name or Refund Date.
Steps to Add New Refund
- Step 1
- Go to Collections → Refund → New Refund
- Step 2
- Enter Customer Information
Enter the Customer Name,Date,Account,Currency,Document, Refund Amount, Cheque Number,Reference,Notes.
When a Customer is selected from the Customer drop-down, All the advances related to that particular Customer will be displayed below.
- Step 3
- Register Refund Amount
Enable the checkbox of the respective advance, enter the refund amount and make sure that the Remaining Amount is 0.
Green Tile and Red Tile displays the approved and unapproved collections from the respective advance.You can view the details of the collection/refund, by clicking the amount displayed on Green and Red Tile.
Final step is to click on Save.Save and new option is available in the dropdown to add a new Refund along with saving the current data.
Clicking on “Refunds” switches you back to the Refund list page.

Actions performed
- Edit/Delete (Only disapproved refunds can be Edited/Deleted)
- Approve/Disapprove
- Send Email
Note *
We have provided the submodules of the collection module for easier navigation.
The Export Dropdown feature allows users to export the document in Excel and Print.
To add a module to the favourites list, click on star.